Showcase §
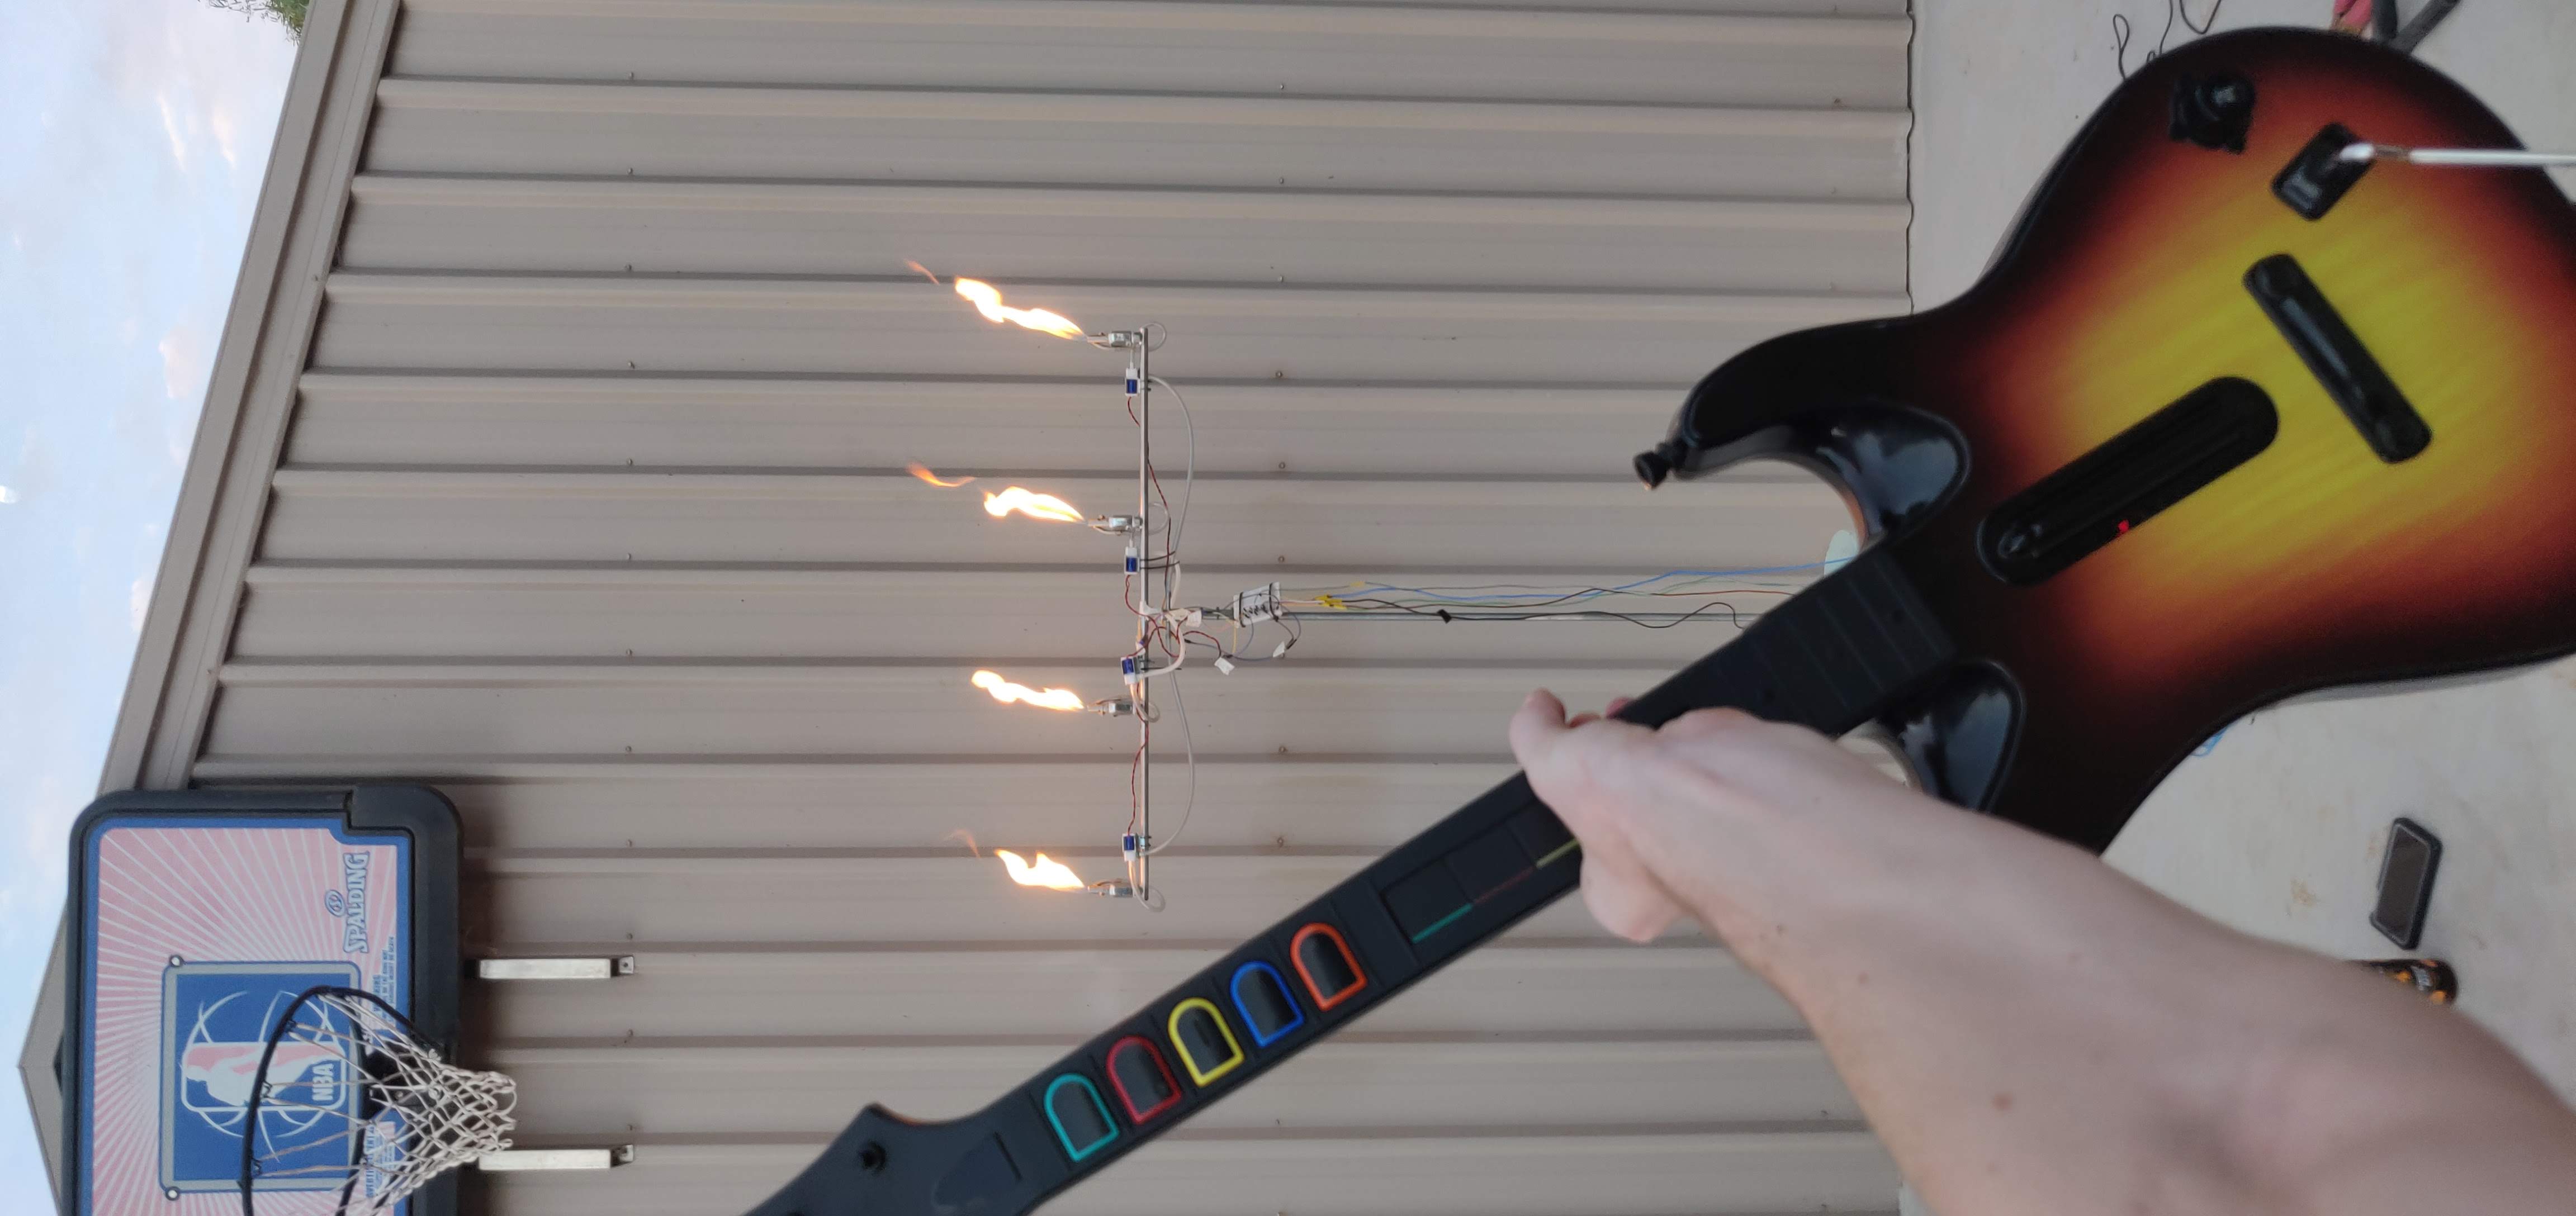
Probably cooler if I show the final product here before talking about how I made it.
That's Dad in the pic btw
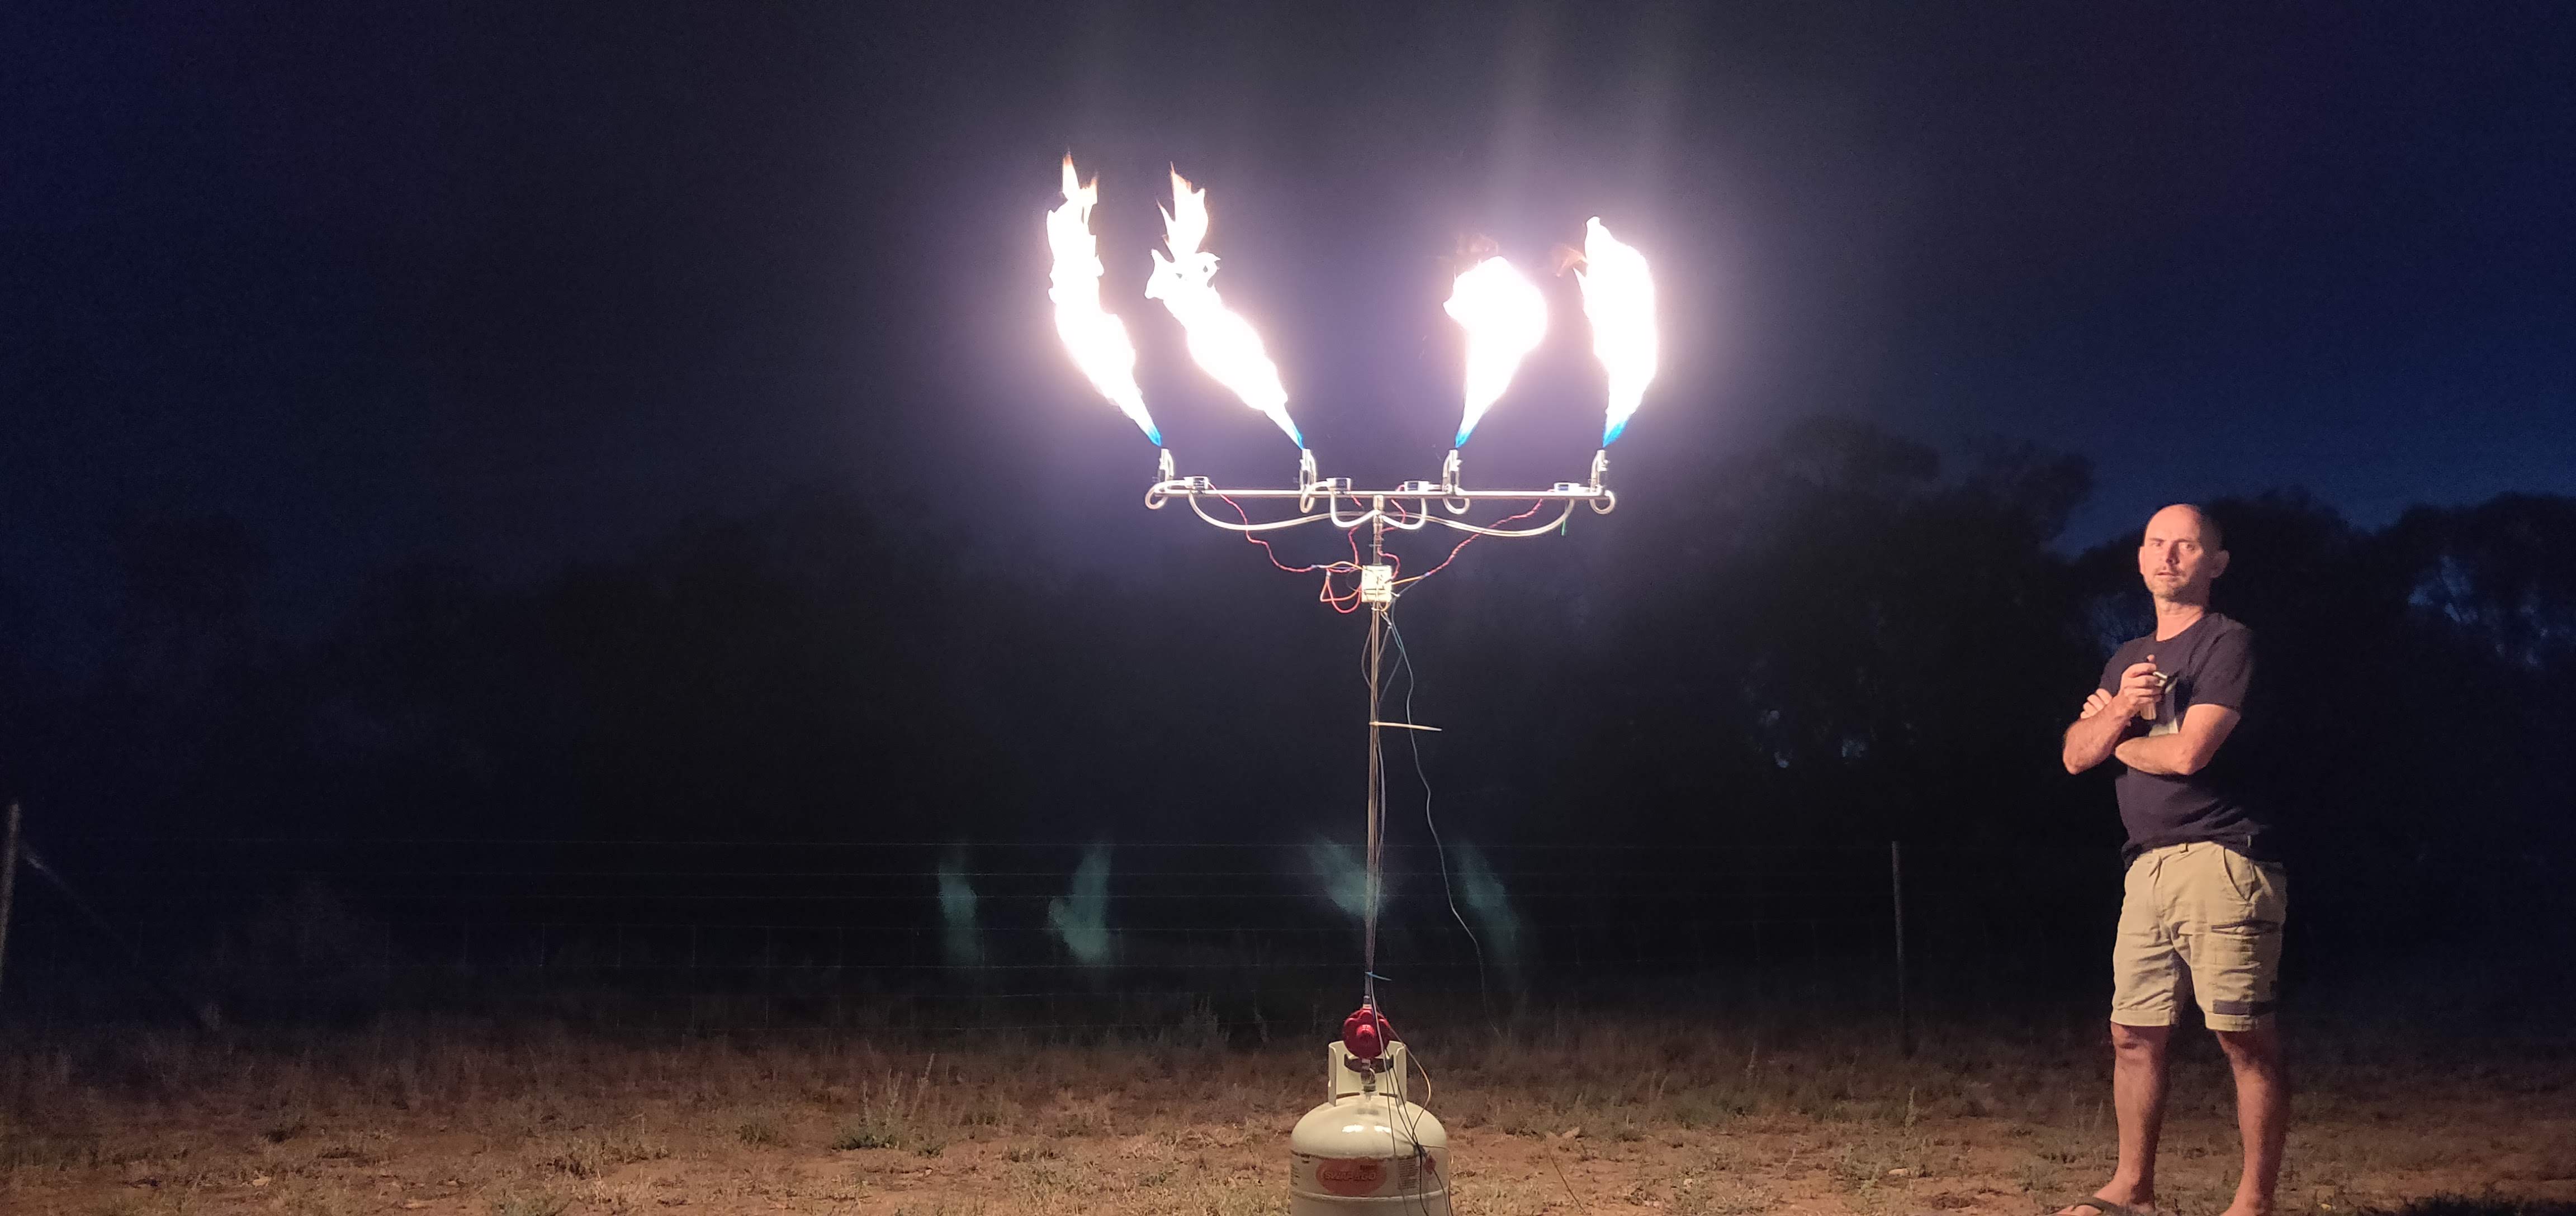
The image above was the first version of the project. It had 4 outlets. Each outlet had a constant flow of gas which was ignited as a pilot light. Each of them also had a solenoid controlled auxiliary line that would allow more gas to flow into the outlet section. Controlling these solenoids would make big flames come out the top.
This particular version had a lower pressure gas regulator than later versions, and the solenoids were hard wired to a bunch of buttons on a breadboard.
Later on I moved to a larger gas regulator and controlled the solenoids with the map files from BeatSaber, as shown below
Below on the left is a Beatsaber generated song, and the right is manual control with a Guitar Hero guitar
Both of these below are Guitar Hero control only
Inspiration §
Back when I had more time on my hands, I came across this awesome video
And I thought that was super cool, and luckily dad thought it was cool enough to help out.
This was my first proper project that went bigger than a few scripts.
The plan §
I was only 15 and had no idea what I was doing. Software and electronics wise I could figure it out, but I couldn't weld or do anything with gas. So, thank you Dad for doing all the welding and making sure we didn't explode 👍.
But I knew where to start with the control. I had used an Arduino before which was a start.
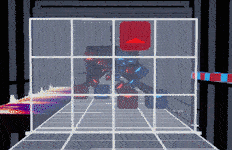
I decided I was going to have control over the flames with some buttons and a Guitar Hero guitar like I'd seen in the inspo video. But I had also just discovered the world of virtual reality and a game called Beatsaber. For some context, this is Beatsaber below
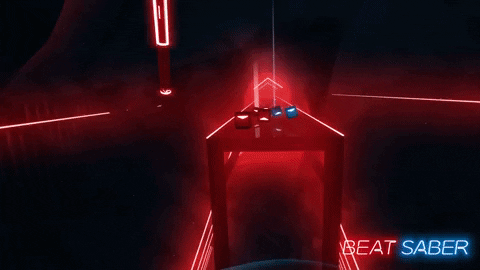
It's virtual reality Fruit Ninja Guitar Hero. The blocks come flying at you in sync with a song, and you chop them up in the right direction. These blocks would become instructions for the solenoids later on ...
Version 1 - Manual control §
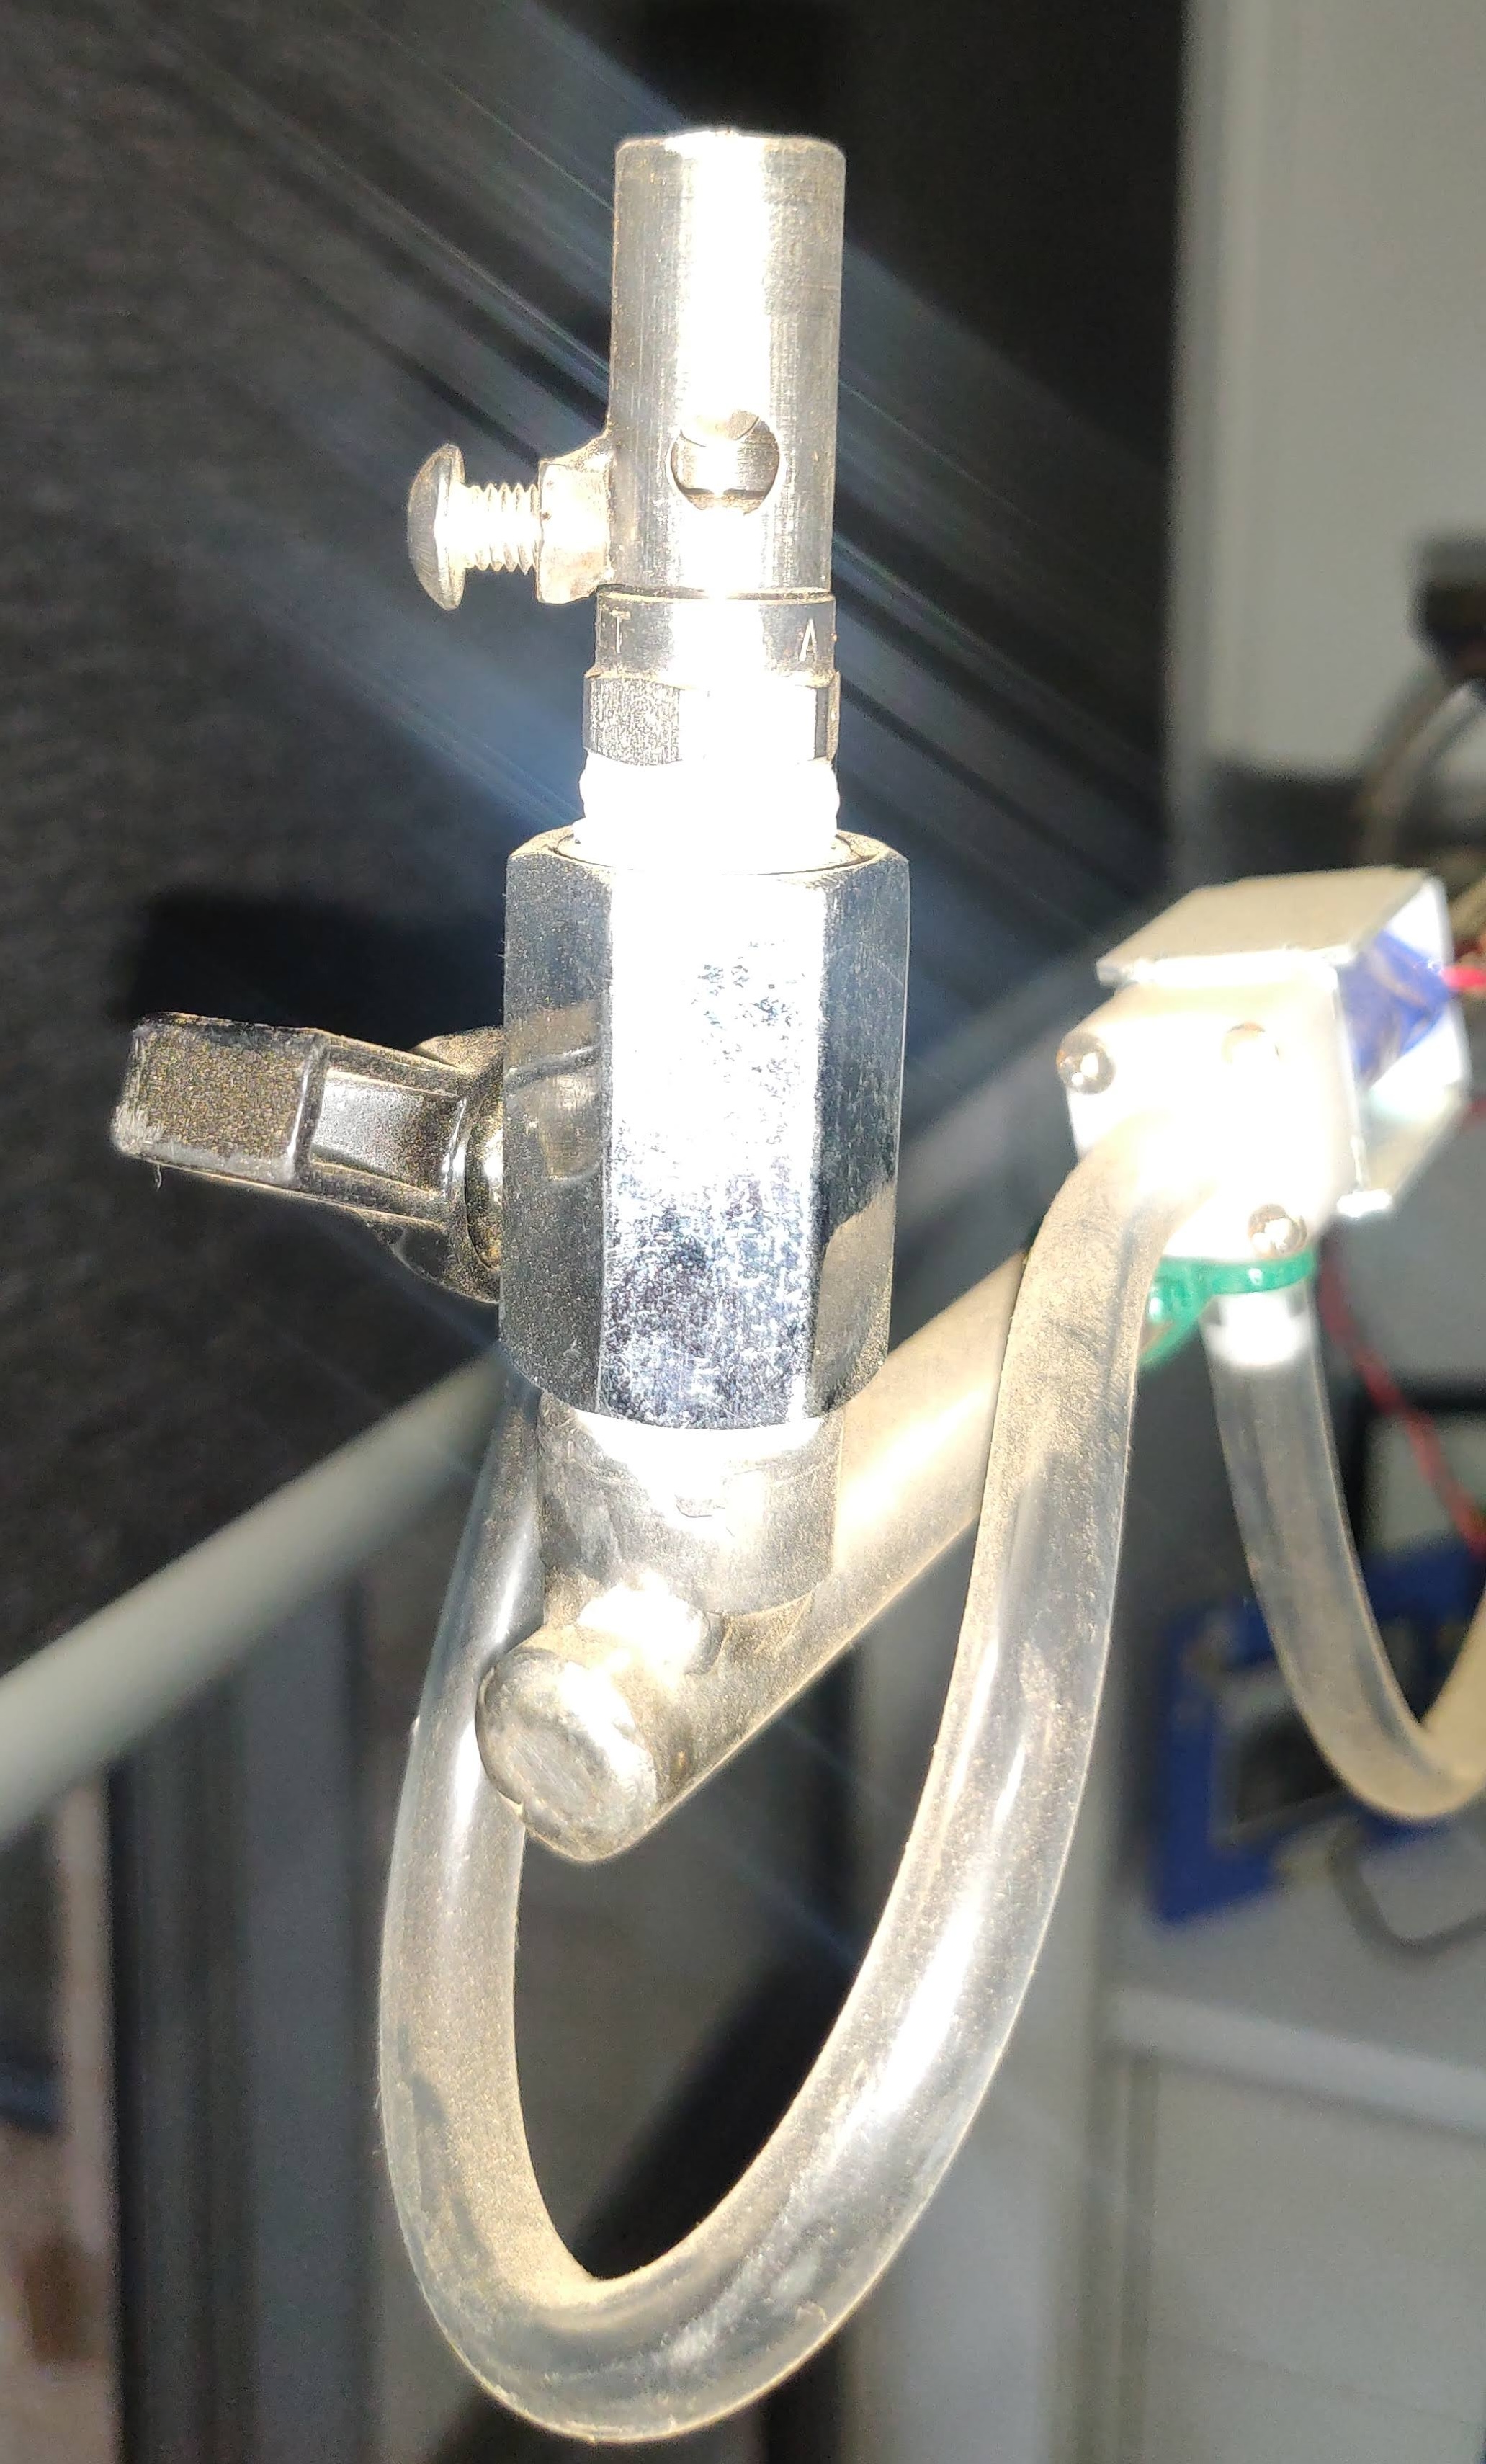
In conjunction with the team pyrotechnical engineer (Dad), I was advised that controlling gas was done with a solenoid, and that the propane technician (Dad) would pipe up the main propane feed into one side of the solenoid, I would turn it on, and there would be flames out the top. Cool.
After I had confidently selected some $10 gas solenoids off of wish.com to control the whole thing, I ventured into the realm of relay control
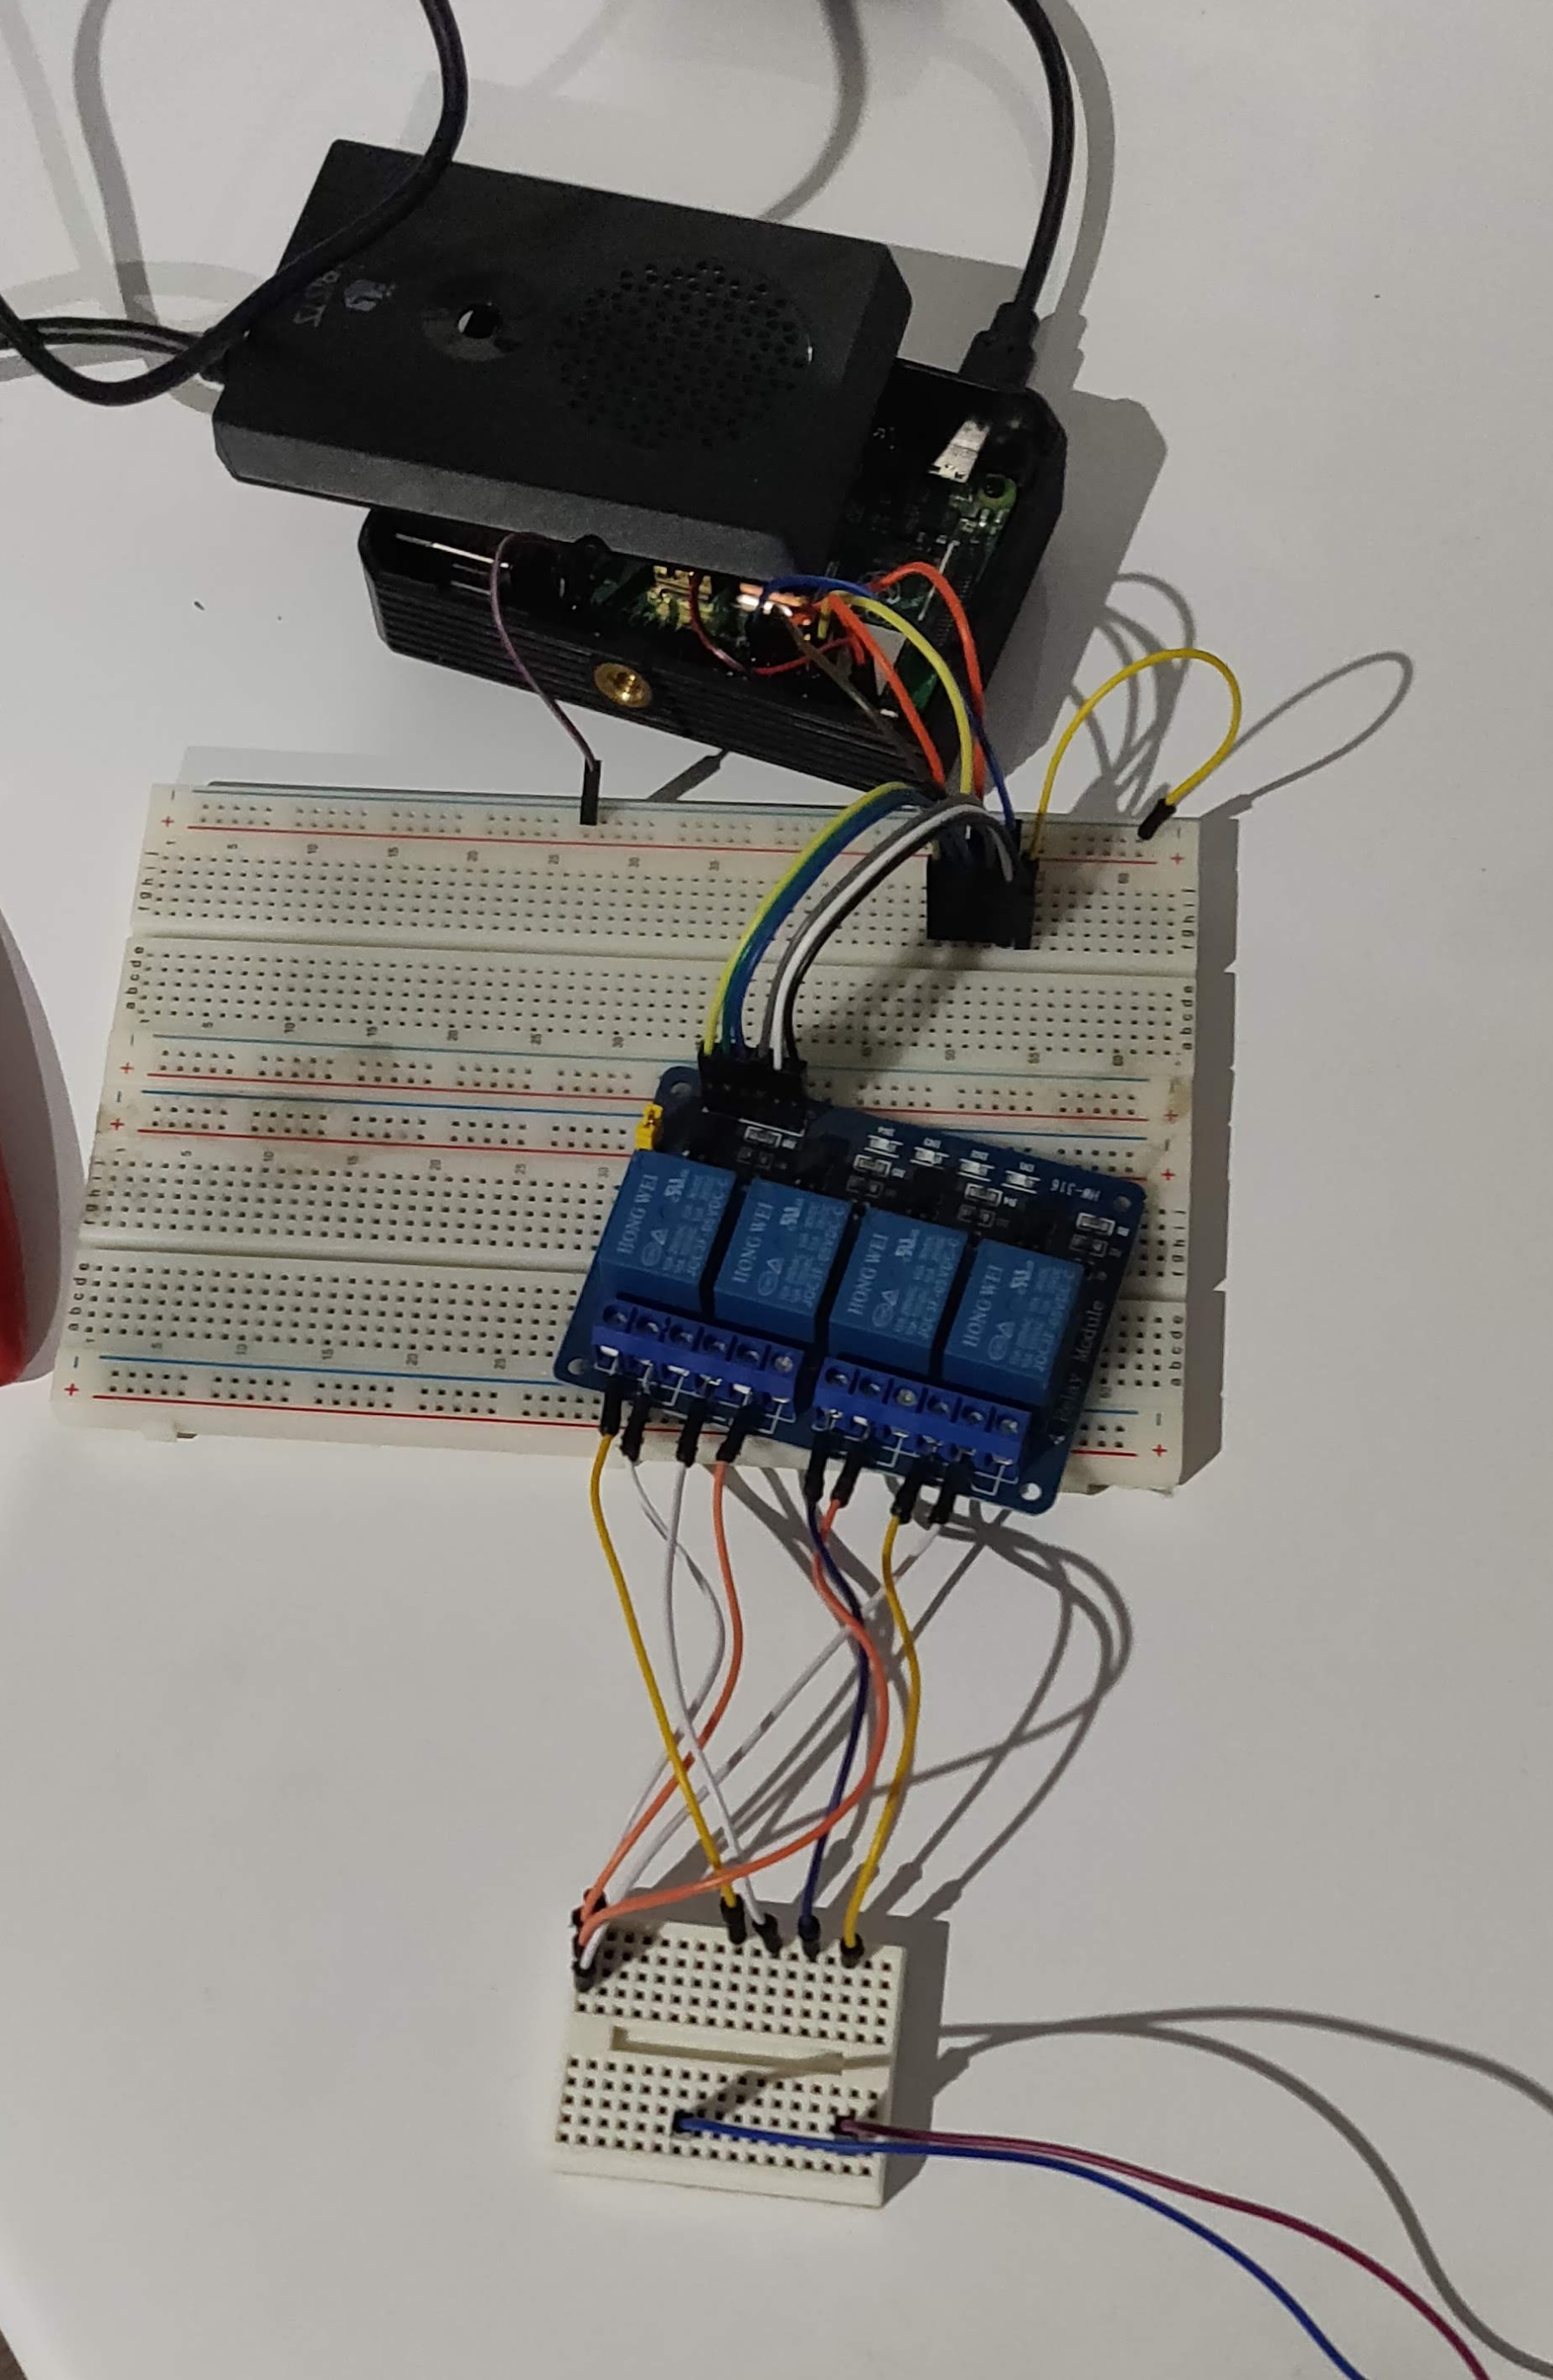
I was just using the generic Raspberry Pi GPIO ports to control each channel individually. Note that I had only ever used the basic Arduino breakout kits with jumpers. So, naive me went and wired it up like a toy.
And then I set it all up outside with a breadboard and some buttons.

Then it was time to turn to more fancy control methods
Guitar Hero Controller §
For those who haven't played Guitar Hero before, there are 5 buttons on the top of the Guitar neck which are pressed while you play, and the signals are sent to a USB dongle which is normally plugged into a console.
I was lucky enough to find a library that let me poll the state of those buttons right in my Python script. I would add the code if I found it, but I think it has been lost to the .gitignore aether.
Regardless, here's a video of me using the controller to actuate the solenoids.
Beatsaber §
Now, this was probably my favourite.
Remembering back to the gameplay of a Guitar Hero Fruit Ninja game
Each of the blocks in a map are stored internally with a timestamp, row and column value inside a .dat file
{
    "_time": 173,
  "_BPMChanges": [...],
  "_events": [...],
  "_notes": [
    ...
      {
      "_time": 9.875,   // time relative to bpm
      "_lineIndex": 2,  // column
      "_lineLayer": 0,  // row
      "_type": 0,
      "_cutDirection": 1
    },
    ...
  ],
  "_obstacles": [],
  "_bookmarks": []
}
If we only consider the _time and _lineIndex (column) value, we can convert this data into a set of timestamped bursts for 4 different flames.
So I made a script that would go through all the _notes in a game file and extract the time and column value into a massive list like this
[
[9.875, 0, 0, 1, 1], # time, flame1, flame2, flame3, flame4
[11, 1, 1, 0, 0],
[12, 0, 0, 1, 1],
[12.938, 1, 0, 1, 0],
...
]
In the first list of the 2D list above [9.875, 0, 0, 1, 1], the 9.875 is the time the block appears, and the set of 4 numbers after are the boolean values for the relays. The 0, 0, 1, 1 means that the 2 most left relays remain off whilst the 2 far right ones are on.
Then, it's just a matter of starting a software stopwatch and triggering a burst of flames each time a block is detected
b = datetime.datetime.now()
c = (b - a)

stp = "{:.3f}".format(c.seconds + c.microseconds * 1e-6)
stopwatch = float(stp)*(_bpm/60)
Note that stopwatch is relative to the BPM by multiplying the seconds (1.123) by the BPM scale (_bpm / 60).
In fact, looking back at this code in particular, I think it might have a few issues.
Struggle §
I would also like to note that I was so incredibly bad at coding that I re-invented the continue keyword by accident. I think this took me like 1 hour of debugging. Clearly my first experience with it's use case
Before learning about continue
for m in time_hold:

    holder_list[0]=round(notes[m]['_time'],3)
    _count=1
    i_finished = False

    if notes[m]['_lineIndex'] == 0 and channel_1_set == False:
        holder_list[1] = 1
        i_finished = True
        channel_1_set = True
    elif channel_1_set == False:holder_list[1] = 0

    if notes[m]['_lineIndex'] == 1 and i_finished == False and channel_2_set == False:
        holder_list[2] = 1
        i_finished = True
        channel_2_set = True
    elif i_finished == True and channel_2_set == False:holder_list[2] = 0

    if notes[m]['_lineIndex'] == 2 and i_finished == False and channel_3_set == False:
        holder_list[3] = 1
        i_finished = True
        channel_3_set = True
    elif i_finished == True and channel_3_set == False:holder_list[3] = 0

    if notes[m]['_lineIndex'] == 3 and i_finished == False and channel_4_set == False:
        holder_list[4] = 1
        i_finished = True
        channel_4_set = True
    elif i_finished == True and channel_4_set == False:holder_list[4] = 0

form.append(holder_list)
channel_1_set = False
channel_2_set = False
channel_3_set = False
channel_4_set = False

time_hold = []
time_hold.append(i)
After learning about continue
for m in time_hold:
    holder_list[0]=round(notes[m]['_time'],3)

    if notes[m]['_lineIndex'] == 0:
        holder_list.extend([1,0,0,0])
        continue
    if notes[m]['_lineIndex'] == 1:
        holder_list.extend([0,1,0,0])
        continue
    if notes[m]['_lineIndex'] == 2:
        holder_list.extend([0,0,1,0])
        continue
    if notes[m]['_lineIndex'] == 3:
        holder_list.extend([0,0,0,1])

form.append(holder_list)
time_hold = []
time_hold.append(i)
The codebase obviously wasn't perfect, but in the end it did everything I wanted it to do with no issues.
BPM RGB coloring §
At the time of this project I was obsessed with ansi colors in the terminal (I still think they're cool). I decided that I wanted to color the BPM of the song to represent it's pace.
Obviously a song at 60 BPM is tame, and a song at 300 is bonkers. I set some basic thresholds for color ranges and began playing with the Google color picker. From there, I made a Desmos with some outrageous ramps to pick individual Red, Green and Blue values based on the BPM (x axis).
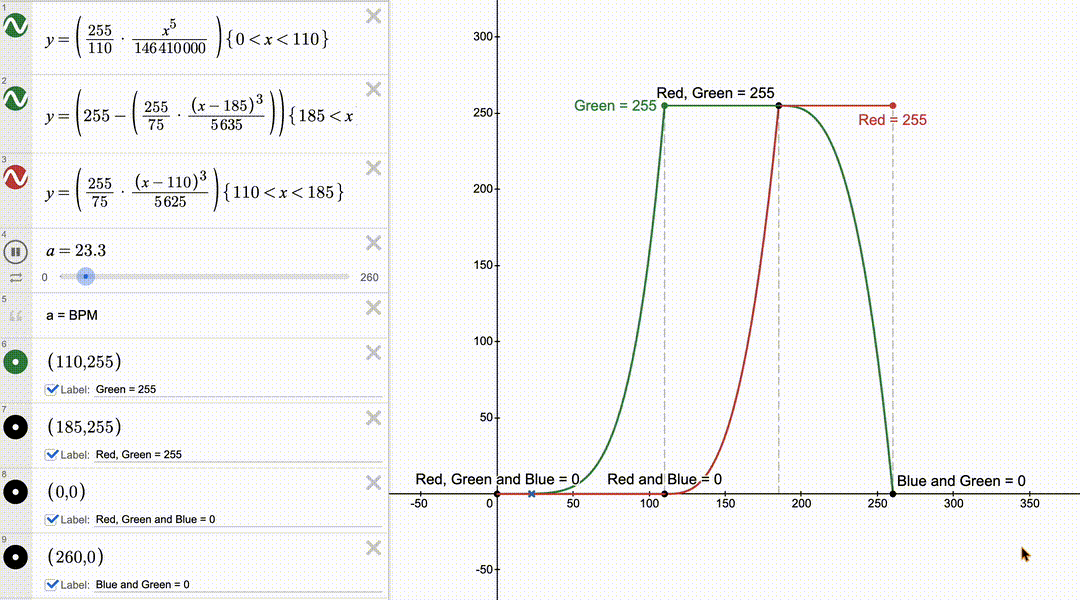
I ended up asking my Math teachers (shout-out to Mr Y and Miss H) how I could connect the threshold values of 0, 110, 185 and 255 to intersect with the function. This alone taught me about function translation, scaling and piecewise notation.
It looks cool (although it's over complicated) as a piecewise too
Final words §
I am so glad I had Dad to help me with this. This kinda started my love for programming and electronics in general.
If anyone reading this wants to help build a new new one, please message me :)